After five hours the painting takes shape even more.
In this image the painting is almost complete.
Most of the elements have been painted in and would only require additional touches to improve.
This will include highlighting certain areas. Highlighting gives additional life to a painting. It gives instant contrast because it is the lightest shade of a color in the painting.
Drop shadows, shadows that fall between two objects create a connection between two elements. Without the drop shadow a plate may appear to float over a table rather than be on the table. Of course this does not necessitate every artist to make drop shadows. Again, art is flexible.
I like to use high contrast. Improving contrast in the painting adds drama plus it makes your other colors pop. Without contrast the painting is flat. Other artists prefer it flat.
I dry brush some more areas to create a different look.
I carefully sprinkle/spray some diluted paint in some areas. Its not noticeable in this pic. A painting is always 10x better to look at in person. You see all the details.
Do you remember the underpainting of Burnt Sienna? See the effect when they show through even under an overpaint.
Making a painting requires a lot of decisions to make and the hardest for me is color selection.
Yes, that's the hardest. You have to decide what color to use and what colors to put together. An artist will have to decide especially if he is making a painting from his own imagination and not copying a picture or an object. And sometimes even if he is copying an image he still has to decide what colors to use!
Only one additional color was used not mentioned in Part 1. Brilliant Red. That makes 15 colors used.
But I was mixing a lot and not using the colors straight from the tube.
Examples of combinations I used are as follows:
1. Yellow + Gey + White
2. Violet + Grey + White
3. Red + Flesh + White
4. Purple Red + White
5. Burnt Sienna + Raw Sienna
6. Raw Sienna + Yellow Ochre
7. Yellow Ochre + White
8. Raw Sienna + White
9. Grey + Blue + White
10 etc...
Here's the finished painting after a total of 22 hours.
Have you guessed the title? Its very easy really. Its about rice and all the visual clues are there.
So there you go. Thats how I do it but sometimes of course I do deviate from my norm to experiment.
For those who are interested to paint or are paintng already, I hope you got something out of this article.
In this image the painting is almost complete.
Most of the elements have been painted in and would only require additional touches to improve.
This will include highlighting certain areas. Highlighting gives additional life to a painting. It gives instant contrast because it is the lightest shade of a color in the painting.
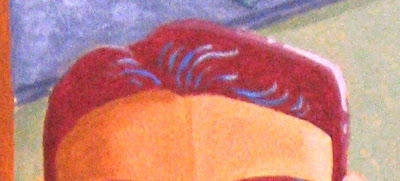 |
| See the lighest shade of purple red on the hair? That is your highlight. The streaks of color (blue) is a signature of mine. |
Drop shadows, shadows that fall between two objects create a connection between two elements. Without the drop shadow a plate may appear to float over a table rather than be on the table. Of course this does not necessitate every artist to make drop shadows. Again, art is flexible.
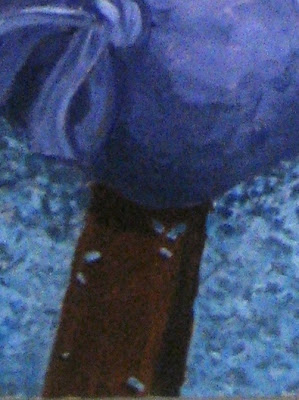 |
| Drop shadow of plastic bag and rice kernels. |
I like to use high contrast. Improving contrast in the painting adds drama plus it makes your other colors pop. Without contrast the painting is flat. Other artists prefer it flat.
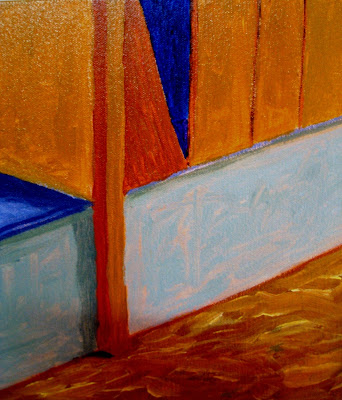 |
| High contrast of dark blue near yellows. |
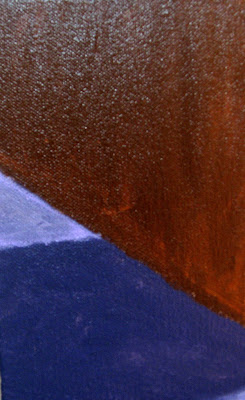 |
| High contrast of light violet-grey adjacent to dark violet-grey, Vandyke Brown and Burnt Umber |
I dry brush some more areas to create a different look.
 |
| Dry brush effect. Light violet-grey over dark violet-grey |
I carefully sprinkle/spray some diluted paint in some areas. Its not noticeable in this pic. A painting is always 10x better to look at in person. You see all the details.
Do you remember the underpainting of Burnt Sienna? See the effect when they show through even under an overpaint.
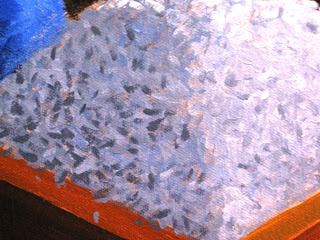 |
| Can you see the Burnt Sienna showing through? Notice that its not all blue, grey and white. There is some brown in there. |
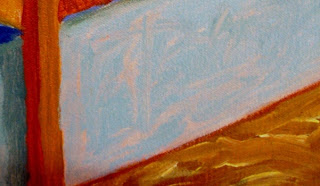 |
| Here they are again. |
Making a painting requires a lot of decisions to make and the hardest for me is color selection.
Yes, that's the hardest. You have to decide what color to use and what colors to put together. An artist will have to decide especially if he is making a painting from his own imagination and not copying a picture or an object. And sometimes even if he is copying an image he still has to decide what colors to use!
Only one additional color was used not mentioned in Part 1. Brilliant Red. That makes 15 colors used.
But I was mixing a lot and not using the colors straight from the tube.
Examples of combinations I used are as follows:
1. Yellow + Gey + White
2. Violet + Grey + White
3. Red + Flesh + White
4. Purple Red + White
5. Burnt Sienna + Raw Sienna
6. Raw Sienna + Yellow Ochre
7. Yellow Ochre + White
8. Raw Sienna + White
9. Grey + Blue + White
10 etc...
Here's the finished painting after a total of 22 hours.
Have you guessed the title? Its very easy really. Its about rice and all the visual clues are there.
So there you go. Thats how I do it but sometimes of course I do deviate from my norm to experiment.
For those who are interested to paint or are paintng already, I hope you got something out of this article.


1 comment:
kapag puno na ang salop (part 1 at part 2)
Post a Comment